

Eli is four. He does not want a lesson in architecture. He wants a wall that stays up long enough for him to knock it down. That is the whole reason the PicassoTiles 100-piece magnetic tile set works at my house. I bought it eight months ago, mostly for him, and it lives in a storage box on the bottom shelf of the grandkids' room. The first Saturday we opened it, my living-room rug became a construction site. Mia, who is seven, wanted a stage. Eli wanted a castle with a tower he could flatten. We built both, and nobody asked for a screen.
Here is what I learned after many Saturdays: a castle with a four-year-old is not a project you finish. It is a game you play in rounds. The PicassoTiles set has 100 pieces, which is enough for two walls and a tower if you keep the base wide. The manufacturer recommends it for ages 3 and up, and the pieces are magnetic plastic tiles that pull together at the edges. The box says multiple players, and that is true in my living room. Eli builds, Mia decorates, I hold the corners. The whole box weighs about 5.5 pounds, light enough for Eli to drag it out and heavy enough that it does not slide off the shelf.
The set that turns a Saturday rug into a castle, not a screen
The PicassoTiles 100-piece magnetic tile set is the bin I reach for when Eli needs to build and Mia needs a stage. No batteries, no app, and no setup beyond opening the box.
Amazon Check Today's Price on Amazon →Build the Castle in Five Steps
Step 1: Clear a flat space and sort the pieces
Pick a spot where the castle can stay up for more than ten minutes. A living-room rug works if it is flat, and a kitchen floor works even better because the pieces do not sink into the pile. I push the coffee table back and put the storage box on the floor beside us. Then I dump the 100 pieces in a loose pile, not a neat stack. A neat stack looks like a school project. A loose pile looks like an invitation.
The first time we did this, I made the mistake of clearing the whole rug and spreading the pieces out in rows like a store display. Eli walked straight through them, sat down in the middle, and asked me when we were going to start. He thought the rows were the activity. Now I do not lay anything out. I push the coffee table back against the couch, about three feet, and leave the rest to him. He picks the spot himself, usually right in front of the window where the light is good, and that is where the castle goes.
Sort the larger pieces into one pile and the smaller pieces into another. Do not make it a lesson. Eli is four, so I say, big pieces here, little pieces there, and he does it for about ninety seconds. That is enough. The instruction manual comes in the box, and we used it once to see how the pieces connect. After that, the building took over.
Keep the lid of the storage box nearby. It is a good tray for the pieces you are not using yet, and it keeps the pieces from rolling under the couch. I also put a small stool at the edge of the rug for me. At sixty-six, I can get down on the floor, but I like having something to hold when I get back up.
Step 2: Build a wide base before you build tall
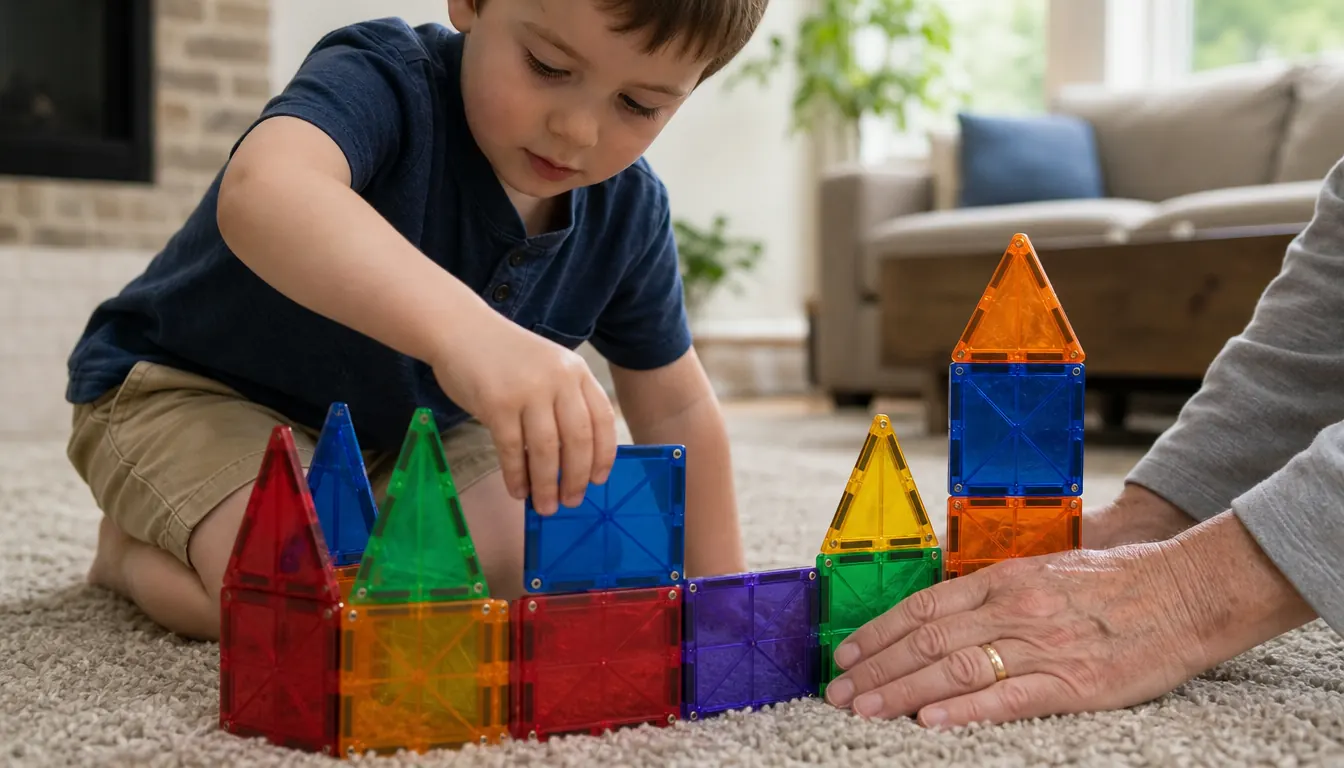
A four-year-old pulls. He leans on the walls and grabs the tower, and a narrow base will tip before the second wall goes up. So start wide. I have Eli make a rectangle on the rug, two tiles deep on each side, with a gap on one end for a door. The gap is important. It gives him a way in and out, and it gives the castle a front.
The first base we built was only one tile deep, and it held fine until Eli leaned on the front wall. Then it did not hold. We rebuilt it with the second row, about a three-foot square on my rug, and the very same lean did not bring it down. That taught him more about how the magnets work than anything I could have said out loud. Now he checks the depth himself before he starts, running one finger along the bottom row like a man inspecting a foundation.
This is the part where a grown-up helps without taking over. I put my hands on two corners and let Eli press the next piece into place. The magnets do most of the work. He feels the pull, and he learns that the edges have to line up. When he misses, I do not correct him. I just say, try the other side, and he does.
Do not build a tower first. I made that mistake with the first castle. Eli wanted the tower, so we built it on a base that was too small, and it fell over before Mia could put a crown on top. He was not upset. He was delighted. But then he wanted to knock down the rest, and the game was over. A wide base keeps the game going.
Step 3: Let the child choose the tower, and you steady the bottom
Once the base is up, the tower is the fun part. Mia wanted a tower with a point. Eli wanted a tower he could hit. We built one tower and then another, and the second one was crooked. I left it crooked. A castle with a crooked tower is still a castle, and Eli was prouder of that tower than the straight one.
PicassoTiles are magnetic, so the pieces find each other when the edges get close. That is the nice part. The hard part is the bottom of the tower, where the weight goes. I keep one hand on the base and let Eli place the top piece. He feels like he did it, because he did. I just made sure the whole thing did not slide off the rug.
That first tower took three tries. The first one fell because I let go too early and it leaned before he had the second piece on. The second fell because Eli bumped it with his elbow, then laughed so hard he bumped it again. The third stood, and it stood because the base underneath it was wide and because I kept my hand at the bottom until Mia had finished draping a scarf over the top. Eleven minutes, start to finish. I remember because I was watching the clock and thinking we had lost the afternoon to a pile of plastic.
If the tower falls, do not rush to fix it. Eli will look at me to see if it is a problem. I say, that was a good fall, and he laughs and starts again. The falling is half the play. If I make a fuss, he stops building and starts waiting for me to do it.
Step 4: Add a door, a window, and one silly detail
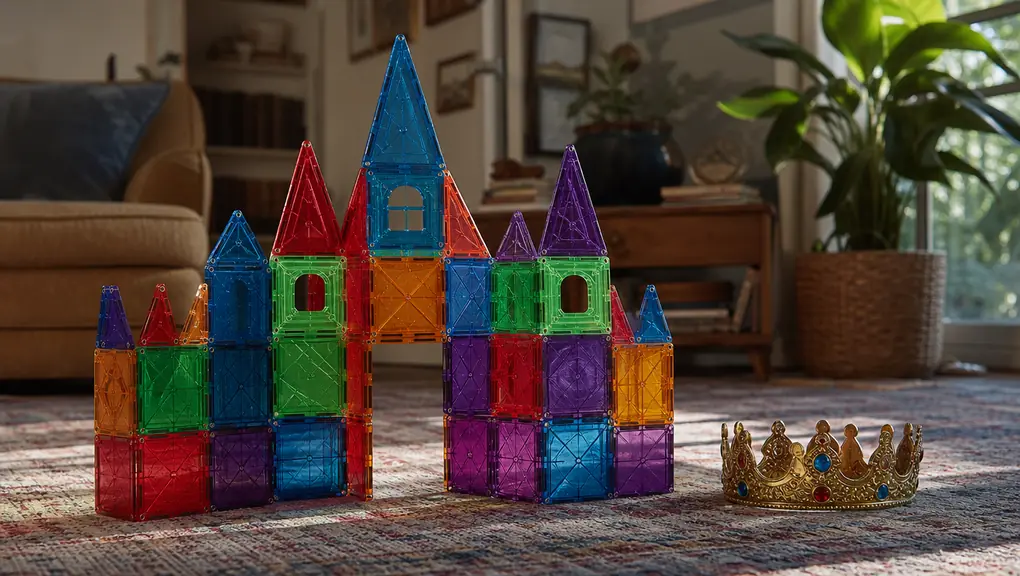
A door is a gap you leave in the base. A window is a gap you leave higher up. That is all it takes. Eli does not need a frame or a hinge. He needs a hole he can put his hand through. Mia puts a small toy through the window and calls it a visitor. The castle becomes a story.
The silly detail is what makes them call it a castle instead of a wall. We use a toy crown from the dress-up trunk, or a small flag made from a scrap of paper and a straw. Mia likes a stage in front of the castle, so we build a low platform and she sings from it. Eli likes a drawbridge, which is a tile that falls down when he pulls it. The drawbridge is not fancy. It is a tile on a hinge of air, and he loves it.
We tried a real hinge once, a straw taped to the back of a tile, and it lasted about two minutes before the tape gave up and the straw fell inside the castle. He was disappointed for all of ten seconds. The plain tile worked better anyway. He lays it across the doorway and tips it with one finger, and that is the drawbridge. Simple beat clever, which is a lesson I seem to relearn every single Saturday.
This is also the point where I stop directing. I ask one question, what else does the castle need, and then I let them answer. Mia says a tower for the princess. Eli says a place for the dragon. I say, show me. They do. The castle stops being mine and starts being theirs.
Step 5: Knock it down on purpose, then build it again
The knock-down is part of the plan. Eli will flatten the castle. That is not failure, and it is not a reason to put the tiles away. I tell him before we start: we build it, we knock it down, we build it again. He knows the rule, so he does not have to ask permission. He waits until Mia has finished her song, and then he takes the tower out with one hand.
After the fall, we pick up the pieces together. This is the part most grown-ups skip, and it is the part that makes the next Saturday easy. The 100 pieces go back in the storage box. The box goes back on the bottom shelf. If we leave them on the rug, someone steps on them, and then the set lives in a closet. A two-minute pickup keeps the set in the living room where the kids can reach it.
One set of 100 is enough for one castle and one stage. It is not enough for a castle, a garage, and a spaceship at the same time. That is a good thing. Limits force choices. Eli has to decide whether the next tower is worth taking apart the wall, and that is a real decision for a four-year-old. I would rather have one set that gets used than three sets that get dumped on the floor and ignored.
What Else Helps
A flat surface matters more than a big surface. The kitchen floor is where Eli builds best because the tiles do not sink into the rug. I put a bath towel down first so the pieces do not clatter, and I sit in a kitchen chair while he works on the floor. The castle stays up longer on a hard surface, and I stay comfortable longer in a chair.
The towel does more than I expected it to. It cuts the clatter by half, and it keeps the tiles from skittering across the room every time a wall goes down. Thirty seconds to spread, and the whole afternoon sounds less like a construction site and more like a kitchen. If there is a baby napping in the next room, that difference is the difference between playing and not playing.
Music helps more than I expected. I put on an Elvis record, and Mia dances while Eli builds. The music gives the afternoon a shape. It also gives Mia something to do when Eli is in charge of the tower. When she gets her turn, she builds a stage and sings. The castle becomes a theater, and the theater becomes the game.
Keep the instruction manual in the box. It shows the pieces and a few starting ideas, and it is useful when a grown-up needs a prompt. We do not follow it page by page. We look at one picture, then close it. The point is to get the first wall up, not to finish the manual.
If you have a child who likes to sort, let them sort. Mia sorts by size and makes neat piles. Eli sorts by grabbing a handful and calling it a pile. Both are fine. The PicassoTiles set is forgiving that way. There is no wrong way to start, and there is no wrong way to stop.
The last thing is a place for the box. The PicassoTiles set lives on the bottom shelf of the grandkids' room, where Eli can reach it without asking. That is on purpose. A toy that requires a grown-up to get it down is a toy that gets forgotten. A toy on the bottom shelf gets used on a Tuesday afternoon, not just on a birthday.
The first castle took eleven minutes. The second took four. By the end of the afternoon Eli could hold a wall steady while Mia placed the top piece.
One bin, 100 pieces, and a Saturday that does not need a screen
If you want a gift that gets used when the grandkids visit, the PicassoTiles 100-piece set is the one I keep on the bottom shelf. It is heavy enough to feel substantial and light enough for a four-year-old to carry the box.
Amazon Check Today's Price on Amazon →